Showing posts with label 3D. Show all posts

3D - Crate Redemption Arc

 After struggling with UVs for a good portion of the day, I went simple and reverted to the basic, proxy crate just for the sake of my own time and sanity. Textured it in Substance Painter using a few different bevel effects to get the slates of wood and the scratch marks I had previously modeled on the high resolution crate. This was the final result:

Exported out the textures and pulled it into UE4. Applied the textures to materials, and the materials to the crate, and was pretty happy with how it was looking, considering the box is essentially flat with some nice paint:

Laid out the scene with a few more crates at different angles, adjusted the lighting and fog, and took a nice beauty shot of the whole thing:

And now, the big cinematic sequence:

And that's how you do moderately better than last week.

Crate Week 2 - Mistakes Were Made

I regret a lot of what happened, but here's my crate.

Within ZBrush, styled it out. Was going for a crate that might've been left in a tiger pen:

Made a low-poly model (though not super low-poly):

And then the fun low-res model within Maya with the imported high-res model:

The UVs were a bad time and made me want to cry. I went with what I got and slapped it into Substance Painter.


Wow look so artistic:


Crate Creation - Part 1

 Followed along with the provided instruction set and created the cube:


But how to properly display the glorious three-dimensions?!

Edited the lambert material on it, added three-point lighting, and got a nice shot.

Here's a render with Arnold:

And here it is in Unreal:

A good day to be a crate.

Lego Bricks - Part 2


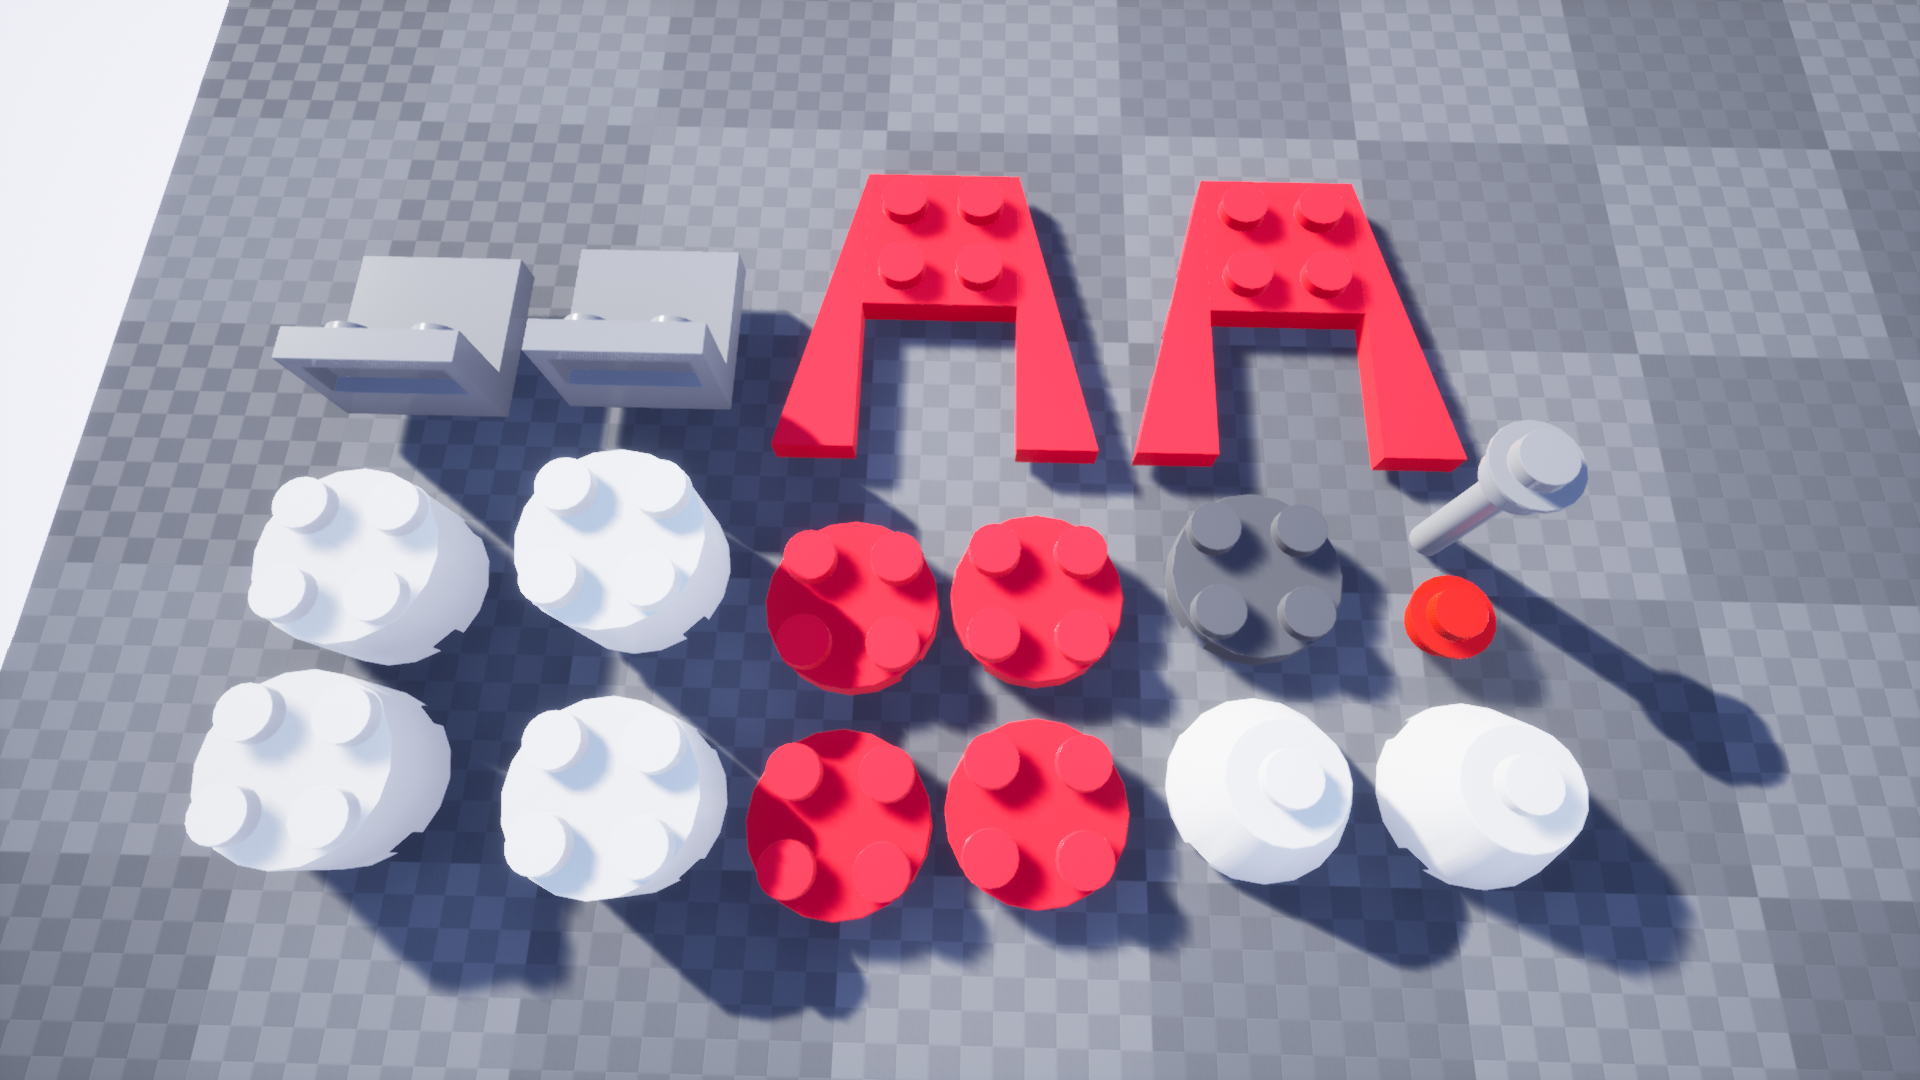
 After creating all the Lego assets, I exported them from Maya and imported them to Unreal 4 without much issue. Made a few basic materials to give it a plastic look and laid the parts out for assembly:


Wire frames:

With all the pieces together, I assembled the ship:


(So fancy wow)

Followed the video on creating a rendering environment and did a few different test shots to see what I liked.

Created the spaceship blueprint and made it so the ship rotates and a light at the top blinks:

Refined my setup and rendered a sequence going off the example in the video:

For the second Lego creation, I went a bit basic and made a cafe setup:

Between the two, I created a space cafe!

A final sequence with the cafe surroundings:

And a distant, still shot:


Lego Bricks Part 1

 Decided to go with the rocket model for this project:

Using the provided piece reference and the premade assets, I laid out the components and scaled base shapes together. I proportioned the blocks relative to what was provided.
Through much trial and error, I eventually got the divots within the blocks as well.

Finally, I had all of them created and added bevels to polish the set off.


Minecraftish Level

Completed the block tutorial and put on my own (non-transparent at the time) grass texture on the block:

I made five textures for this level: wood grain, water, grass, ground, and flowers.
Saved them as Targa files and imported them into Unreal. Applied the textures to individual materials and adjusted some of their settings. Specifically, the flowers and grass had transparency put on them with a mask mode and the water was adjusted to give some shine:


Adjusted the blocks to have one of each of the textures then set them in the world to see how they looked:
Fussed around and filled out the scene with the blocks:
Beauty shot!

Module 1 - Box Level

Note: Had to redo some of the screenshots after finishing, so there may be discrepancies between screenshots is due to losing a few of the image files.


First up: proving I can export/import from UE4 to Maya.

1) Take your chosen scale reference (this good mannequin boy) and export the file.


2) Export file as .fbx into the folder I'm temporarily dumping assets into.


3) Now we go into Maya to import our good mannequin boy.

There he is.

4) The boy has been acquired. Time to use him to scale the throne I'll be making.
And that's the end of the export/import from UE4 to Maya.

Have a seat, good sir. (And here is where there's a cut due to a loss of a screenshot.)

Created four cubes

    -One for base of the throne

    -Two for the arm rests' beginnings (beveled and smoothed on the inner corners)

    -One for the back (sides divided and splayed out at the top)

Created a rough sketch of the throne idea to go off.

Fussed around with more cubes and some cylinders until it turned into this:


(Please don't judge the number of objects; definitely could've done this more efficiently, but was working with some basics)

Now for the export/import from Maya to UE4!

1) Select all the lovely objects (so many objects yay)

2) Export selection into the dumping grounds


3) Jump over to UE4 and import the lovely .fbx file

4) And now... we have... all the objects.

Onto the building process (or what of it I could document).

Dragged out all the objects into one tasty chunk

Also grabbed the block from the tutorial for some staging!

Created 3 different materials for the setup:


And then I threw it together into a platform and some pillars and slapped the colors onto the throne:

Edited the black metal sheen a little:

Surrounded the throne with walls and added a point light so that it exists in a dramatic void.


Beauty shot!