Crate Creation - Part 1

 Followed along with the provided instruction set and created the cube:


But how to properly display the glorious three-dimensions?!

Edited the lambert material on it, added three-point lighting, and got a nice shot.

Here's a render with Arnold:

And here it is in Unreal:

A good day to be a crate.

Common Art - Lighting and Rendering

Began rendering out with the sea horse model. Put in the recommended 3-point lighting (point light, area light, and sky dome) and arranged them around the figure. I limited the sky dome in most of these cases as it blew out the surroundings and took some focus away from the model. The point light I used for this was tinted slightly teal to compliment the orange tone I gave to the model.

The next one I rendered was the alien. I wanted to give it more of a glossy look, so I switched the material to blinn and gave it a darker green tint. Arranged the point light on the head piece and put the area light opposite. Adjusted the result slightly in Photoshop as the renders came out darker than anticipated.

For the frog monster, I stuck with using a lambert material and set up the same basic lighting around the model. I tinted the skin green and colored the base brown to emphasize the bust. I went softer overall on this lighting while still getting the wrinkle details.

Finally, the dreaded Lego ship needed to be rendered. I was (through some trial and error) able to export it into Maya. I had to adjust the materials into blinns rather than the default Phongs in order to get the colors to come across. It also helped give it the plastic feel with a strong reflection. Set up the lights and rendered it out:


Lego Bricks - Part 2


 After creating all the Lego assets, I exported them from Maya and imported them to Unreal 4 without much issue. Made a few basic materials to give it a plastic look and laid the parts out for assembly:


Wire frames:

With all the pieces together, I assembled the ship:


(So fancy wow)

Followed the video on creating a rendering environment and did a few different test shots to see what I liked.

Created the spaceship blueprint and made it so the ship rotates and a light at the top blinks:

Refined my setup and rendered a sequence going off the example in the video:

For the second Lego creation, I went a bit basic and made a cafe setup:

Between the two, I created a space cafe!

A final sequence with the cafe surroundings:

And a distant, still shot:


Common Art - Value Practice

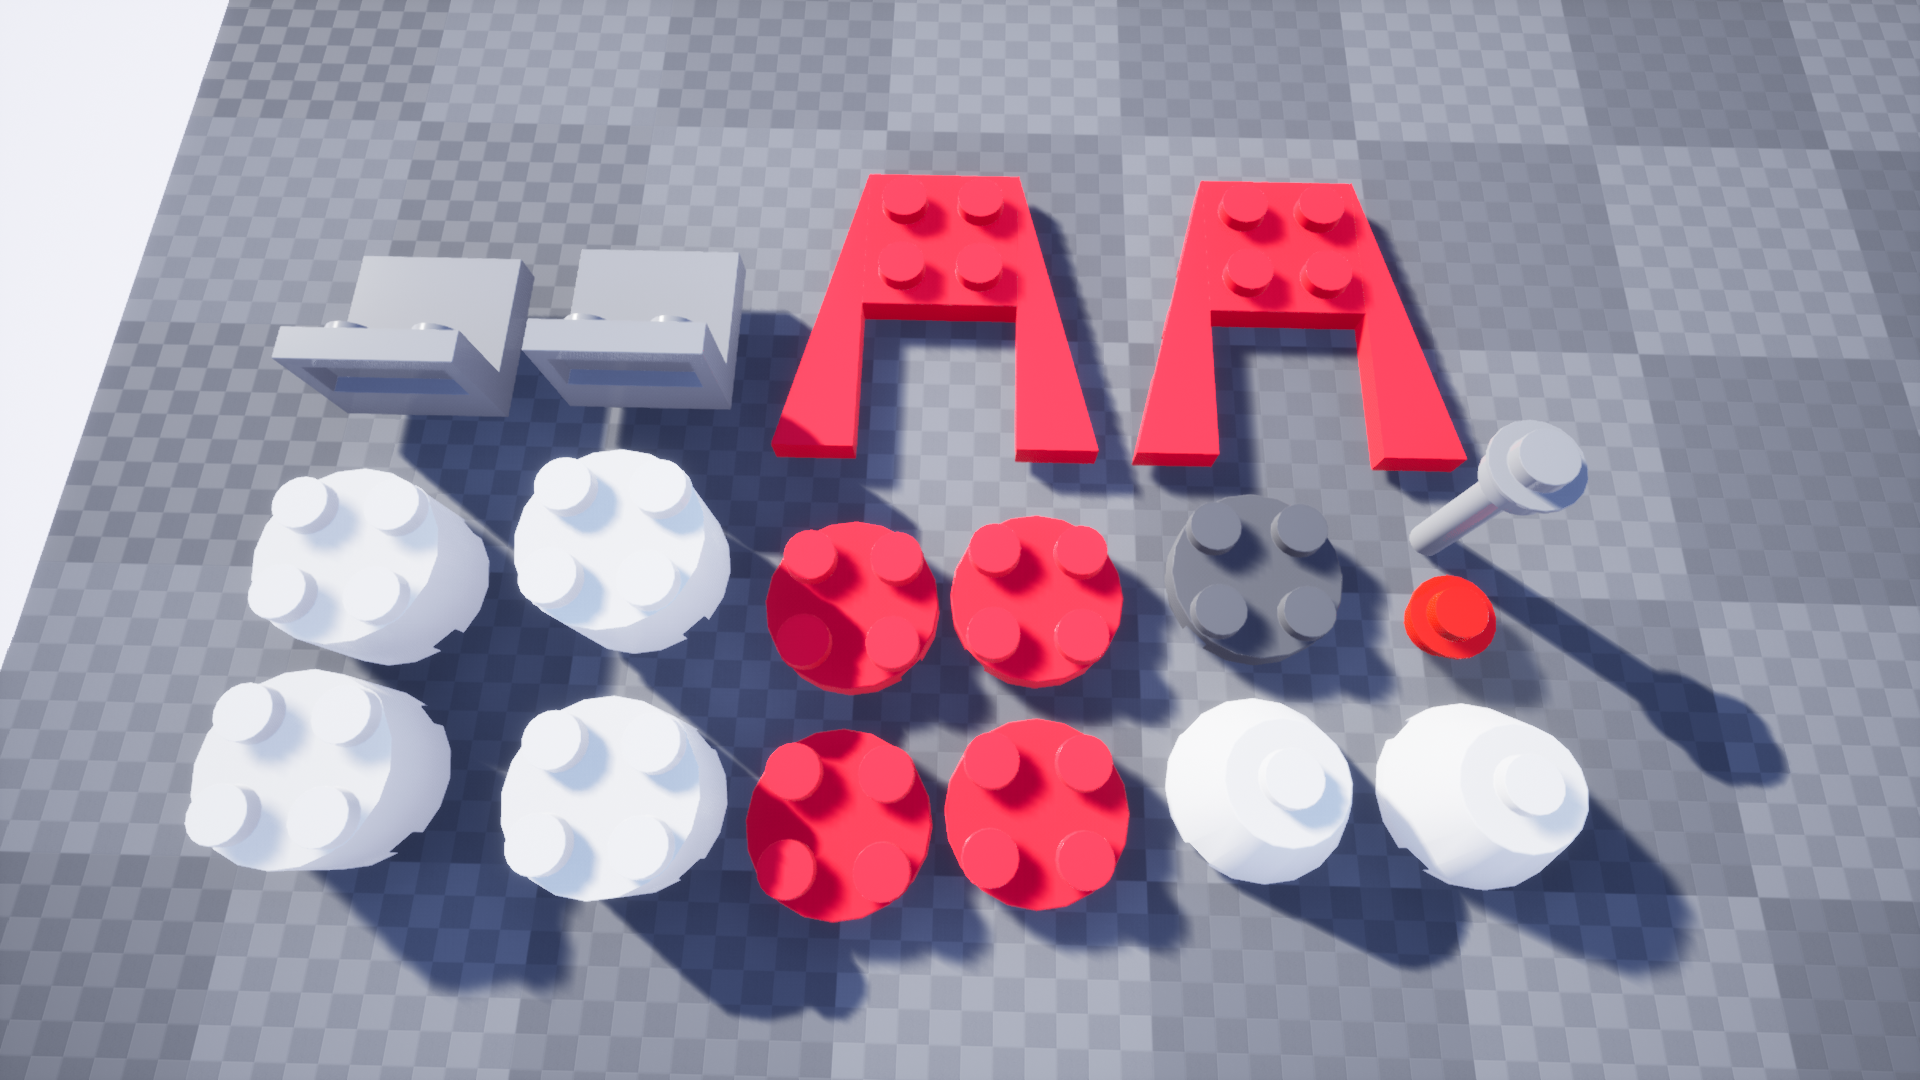
 For this project, I wanted to try and emulate the feel of the titans found in Hyper Light Drifter:


I like the feel of the creatures being embedded into their environment but still retaining these vivid colors.

I chose a color palette based off the top right image and applied it to the ambient occlusion with a multiply layer. I also went ahead and added a bit of a gradient for a bit of a background:


At this point, I ended up having to submit the assignment a bit incomplete, but I still wanted to work on it past the time it was due and test out what I didn't have time for.

I applied a linear burn to the gradient so that it would pick up on the shadows from the AO layer and ground the vehicle a bit more in this roughly made sky/grass gradient.

Then I added in two gradient layers: one for a light source, and the other to vignette the other side. The light was given a hard light filter, and the vignette was set to subtract. Lowered the opacity a good bit on both of them so that the effect would be more subtle.

Adjusted the blending options on the normalized layer and pulled out just the green so that the highlights would be coming from the same direction as the light source gradient. The result of all that ended me up with this:


The second pass definitely makes the vehicle more believable, even if it still isn't quite in an environment. Messing with the layers and adjusting things exposed me to a bit of what Photoshop can do, even if I ended up going a bit basic with the actual effects. If I went a bit further with it, I would have also liked to see what could be done to the layers to give it a rougher, more aged feel without having to go in and texture it too much by hand.

(After in-class critique)

Added in the linework and did a clipping mask to give it a touch of a dark purple color. Adjusted background colors and tried to draw in stronger towards the top with the gradient layers. Fussed with some minor things. Changed the light coming in from the left to be radial from the center and ultimately ended up with this:


Lego Bricks Part 1

 Decided to go with the rocket model for this project:

Using the provided piece reference and the premade assets, I laid out the components and scaled base shapes together. I proportioned the blocks relative to what was provided.
Through much trial and error, I eventually got the divots within the blocks as well.

Finally, I had all of them created and added bevels to polish the set off.


Silhouettes

Based on the mood board and Maya model provided, I tried to go for bulkier, more angled designs and avoided rounder, organic shapes. I also went for a top-down view, going off the idea of it being a game like Galaga, where the player would be viewing the ship from above.

I did all of the work in Photoshop. Using the symmetry tool was incredibly helpful in making sure the design made sense. I varied the angle of the wings and varied the sleekness or bulk between designs to make them more distinct. Designing actual, practical ships wasn't big in my mind so much as going off the ideas of the ships on the mood board and other classic ship designs I've seen in media before.

All in all, it was a nice practice. I'm big on silhouettes, not so much ships, so it combined a strength and a weakness for me.

Minecraftish Level

Completed the block tutorial and put on my own (non-transparent at the time) grass texture on the block:

I made five textures for this level: wood grain, water, grass, ground, and flowers.
Saved them as Targa files and imported them into Unreal. Applied the textures to individual materials and adjusted some of their settings. Specifically, the flowers and grass had transparency put on them with a mask mode and the water was adjusted to give some shine:


Adjusted the blocks to have one of each of the textures then set them in the world to see how they looked:
Fussed around and filled out the scene with the blocks:
Beauty shot!

3D Shape - Sparth

 After looking around for some reference/inspiration, I ended up deciding to go with this piece:

Took some time in Maya roughing out the base shapes, as suggested:

Refined it a bit more, largely leaving divots and smaller details for the Photoshop render:

Took a screenshot of the file and brought it into Photoshop. Overlaid lines and added in a bit more of the depth/details:

Put some base colors down, using another ship from a show I like to base the palette on:
Added in a bit of highlights and shading and a (very, very) rough background for the final piece:


Definitely ran out of time to properly render it out, but definitely found using the 3D shapes helped in understanding the structure of the ship and how it would sit in the world.